 使用 API 调用训练后的 DeepSeek
通过不断地给本地模型喂数据,现在我们已经有了属于自己 定制化 的 AI 模型。
接下来我们可以通过 AnythingLLM 的API接口调用训练后的大模型供我们项目中使用。
# AnythingLLM 官方文档
如果你想在本地部署 AnythingLLM(目前好像只能在Docker中本地部署),可以按照这个文档来做:https://docs.anythingllm.com/ (opens new window)。
AnythingLLM 只是一个图形化的工具,这里我就不在本地部署了,直接使用上节 DeepSeek本地训练中下载的 AnythingLLM 应用程序来获取Api密钥及管理对话。
# 获取 API 密钥
- 进入 AnythingLLM 应用程序,打开设置,在左边菜单栏找到 API 密钥 选项,点击 生成新的 API 密钥 按钮
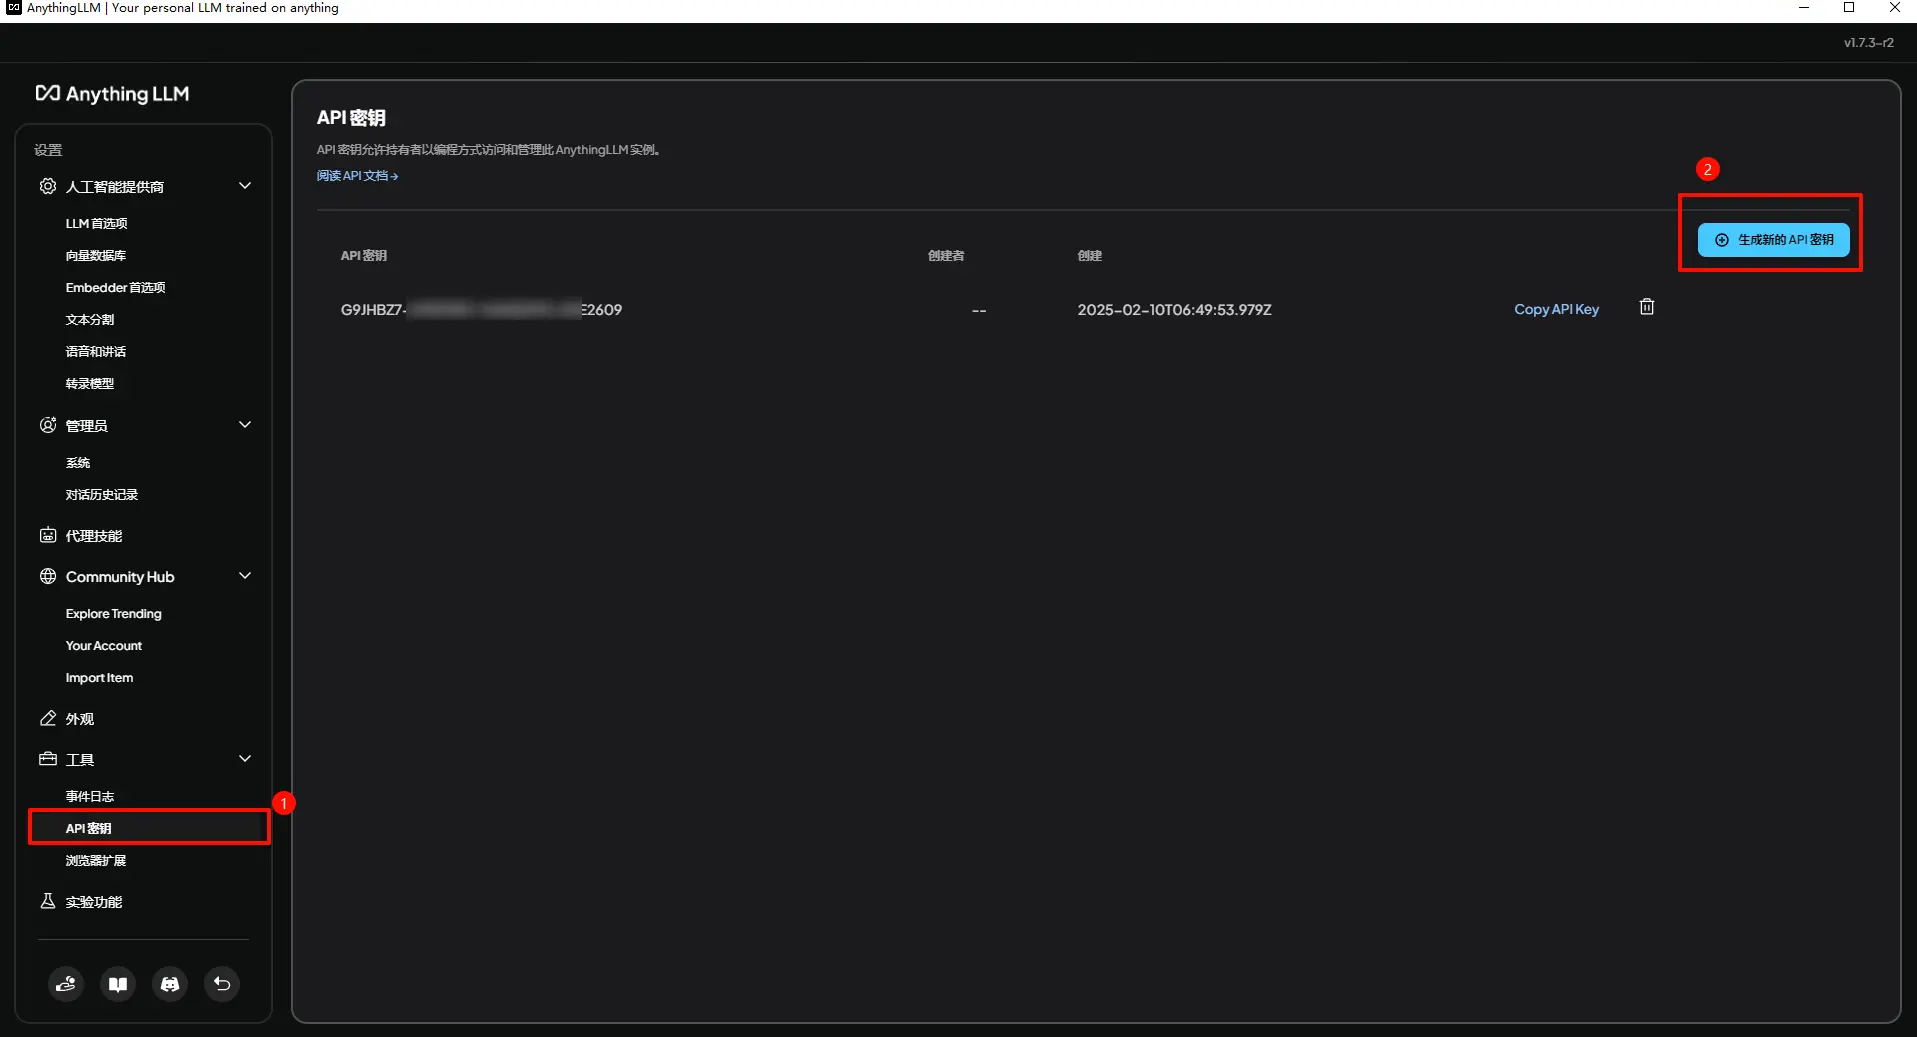
- 点击 Create API key 按钮创建 API 密钥,生成的 API 密钥可以在
API 密钥页面找到

# 访问 Swagger
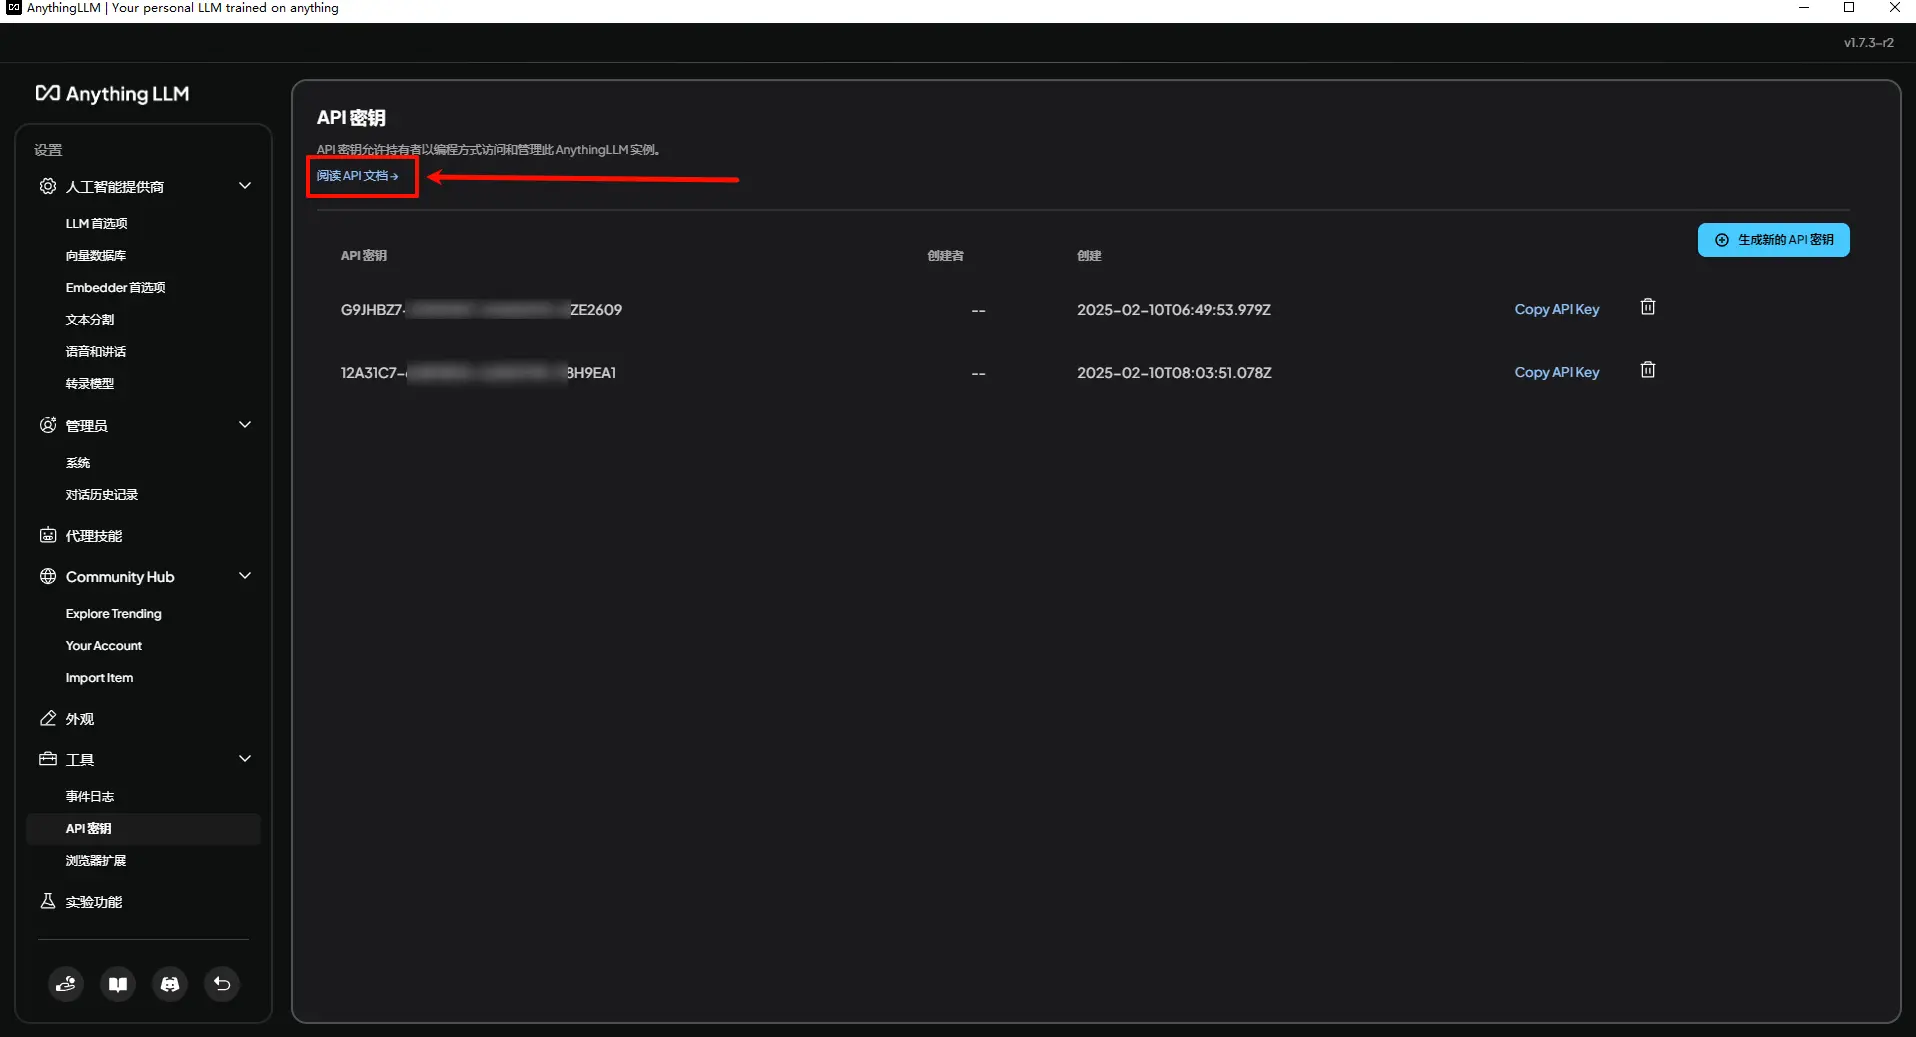
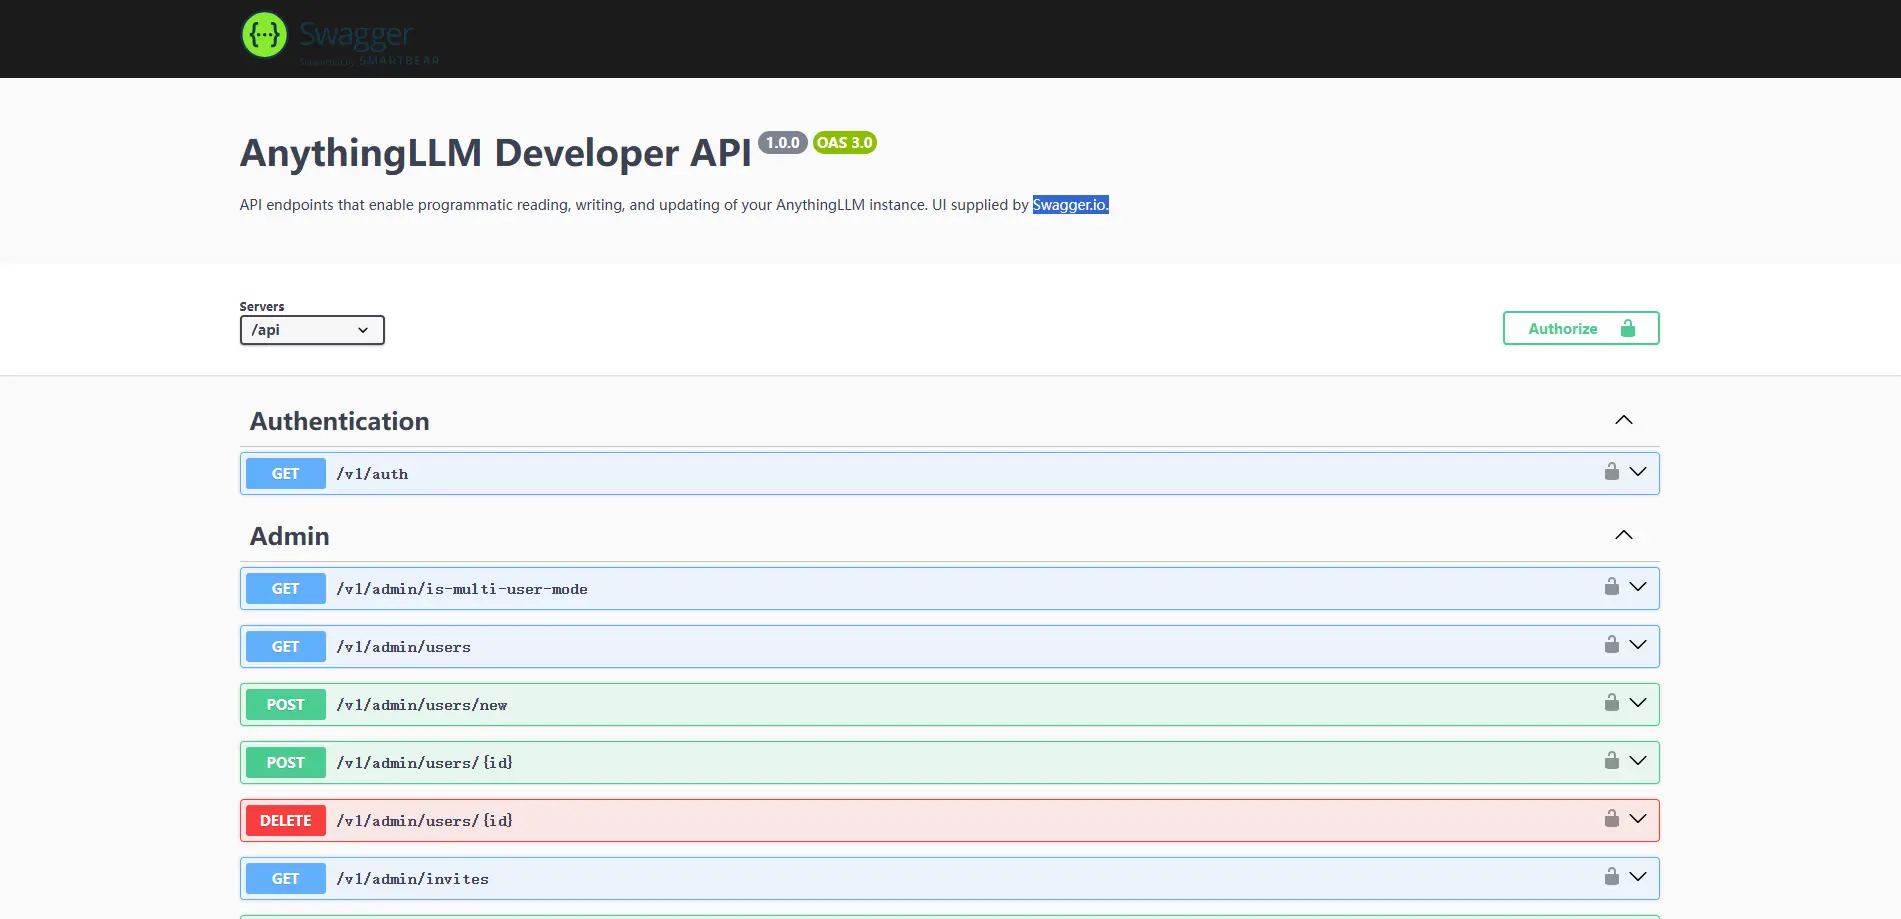
在 API 密钥 页面,点击 阅读 API 文档 进入Swagger 查看 AnythingLLM 的 API 列表,也可以直接访问 http://localhost:3001/api/docs/ (opens new window) 进行查看
API 列表
# 测试 API
现在就可以直接在 http://localhost:3001/api/docs/ (opens new window) 页面测试 AnythingLLM 的 API 了
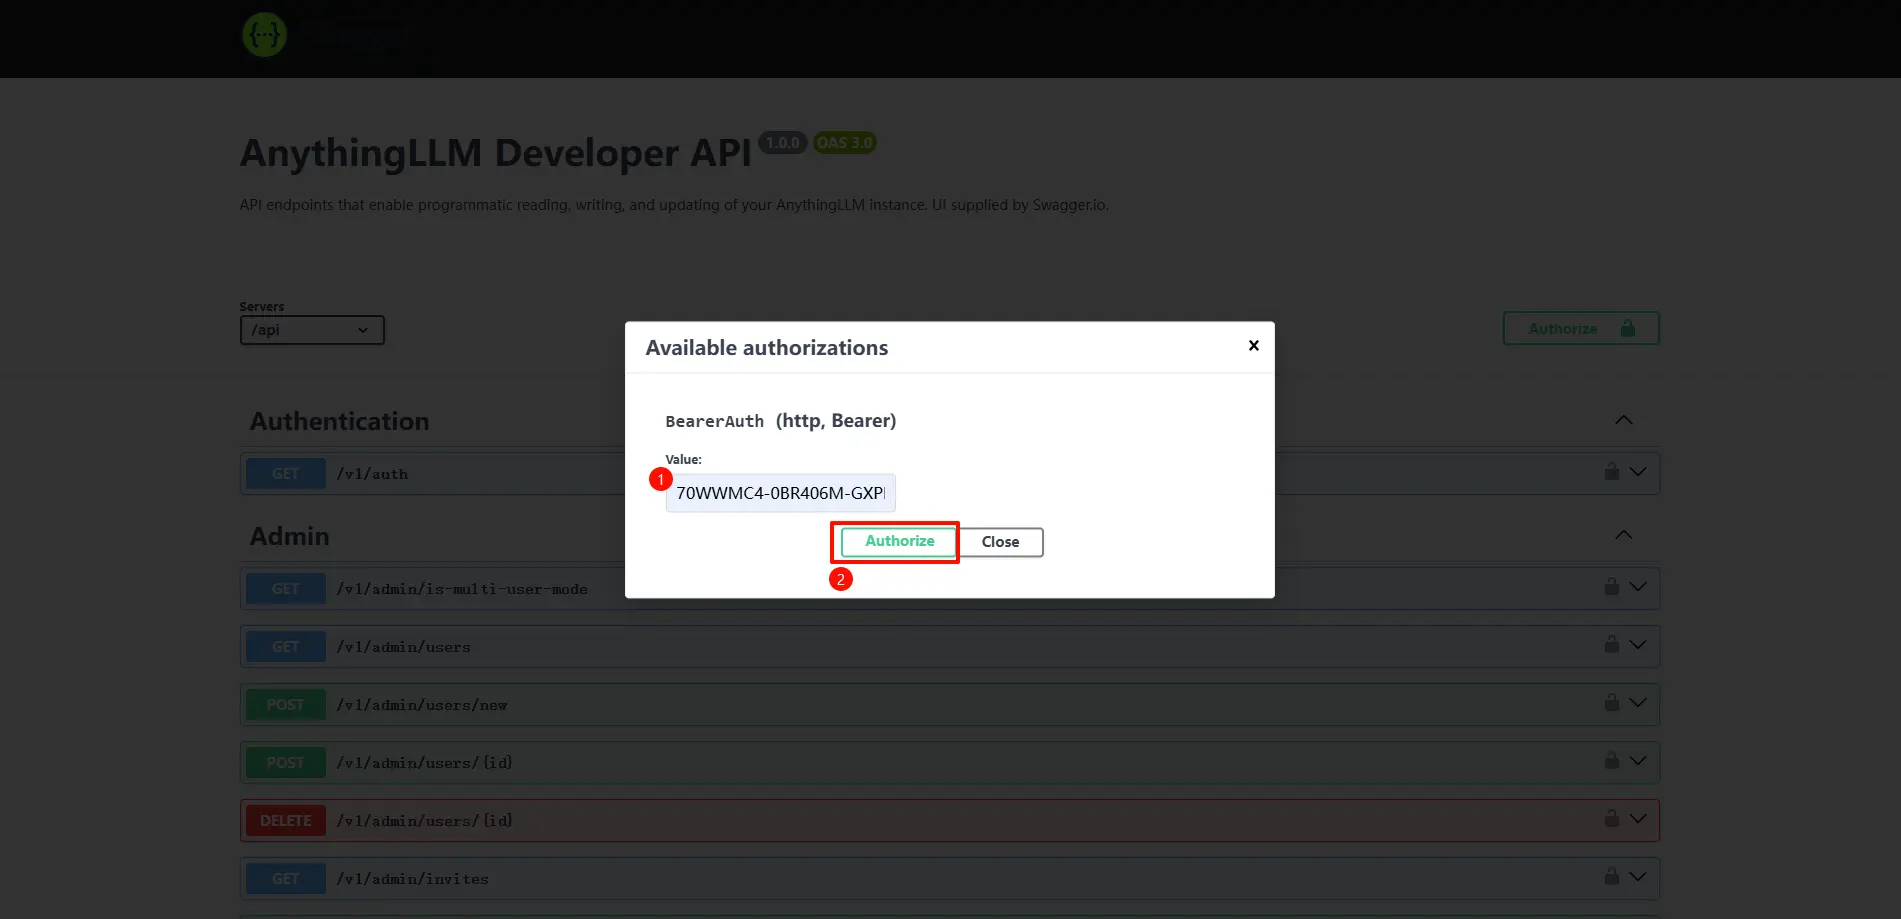
- 点击 Authorize 按钮设置 API 密钥
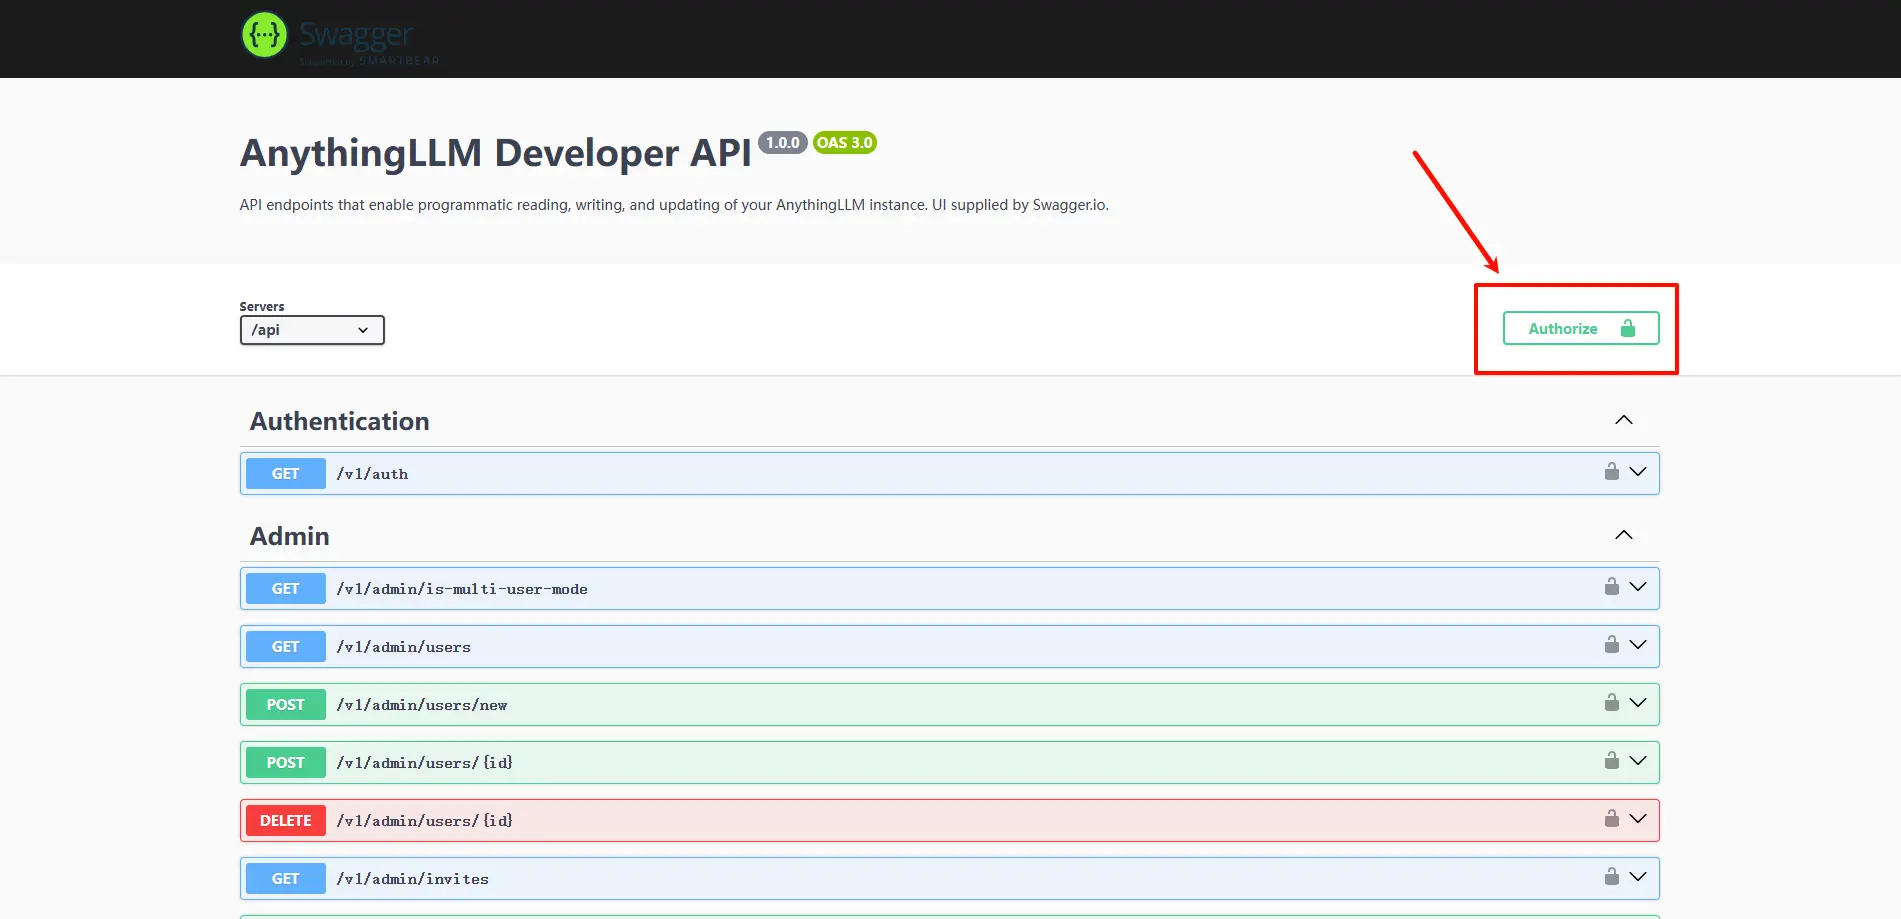
- 在 value 输入框中填入我们上面获取到的 API 密钥,然后点击 Authorize 按钮保存
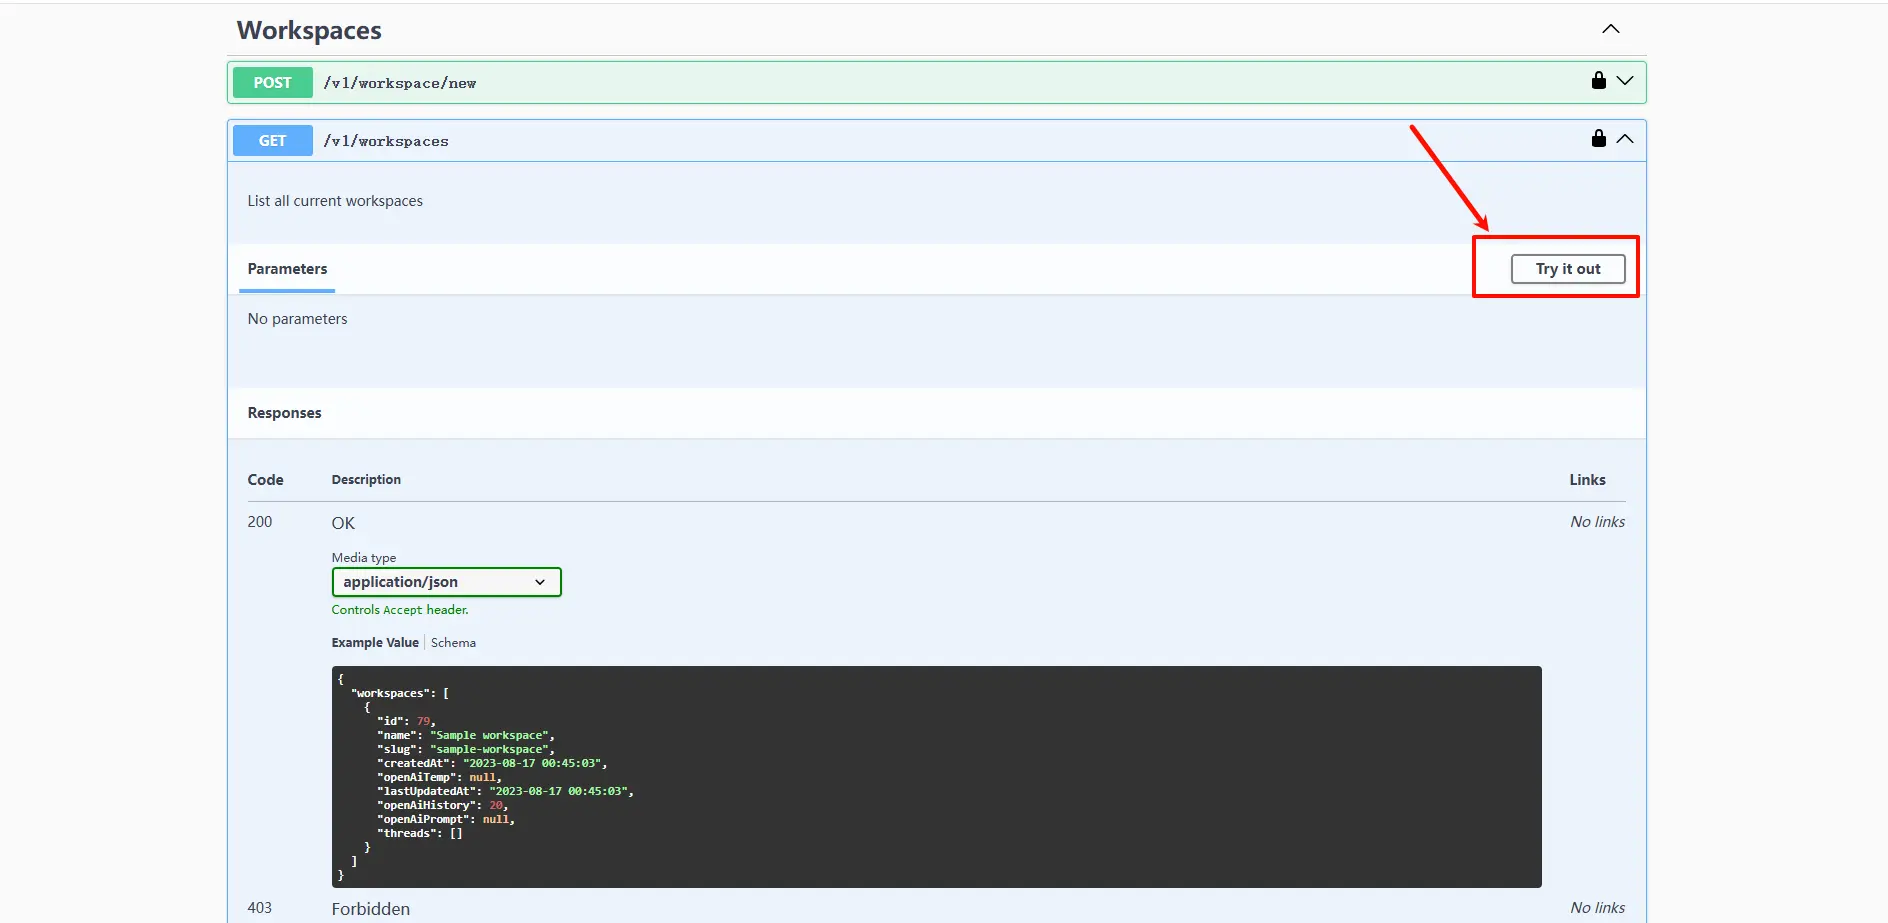
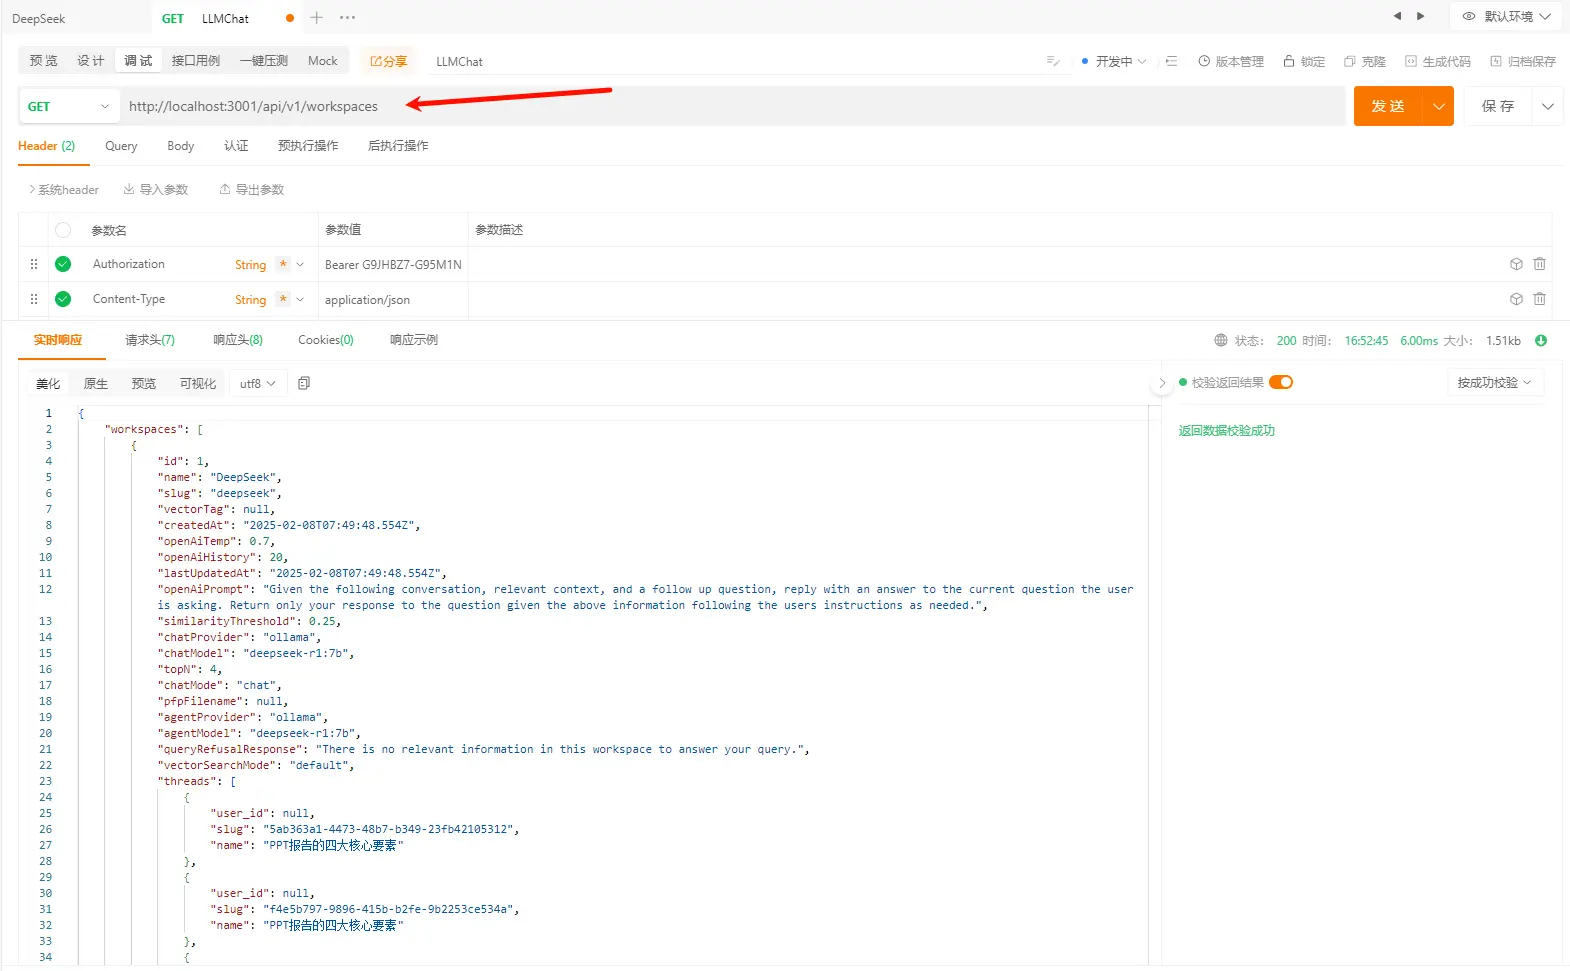
现在就可以测试 API 了,我们用
/api/v1/workspaces来测试(获取所有工作区及对话)- 点击 Try it out 按钮
- 点击 Eecute 按钮
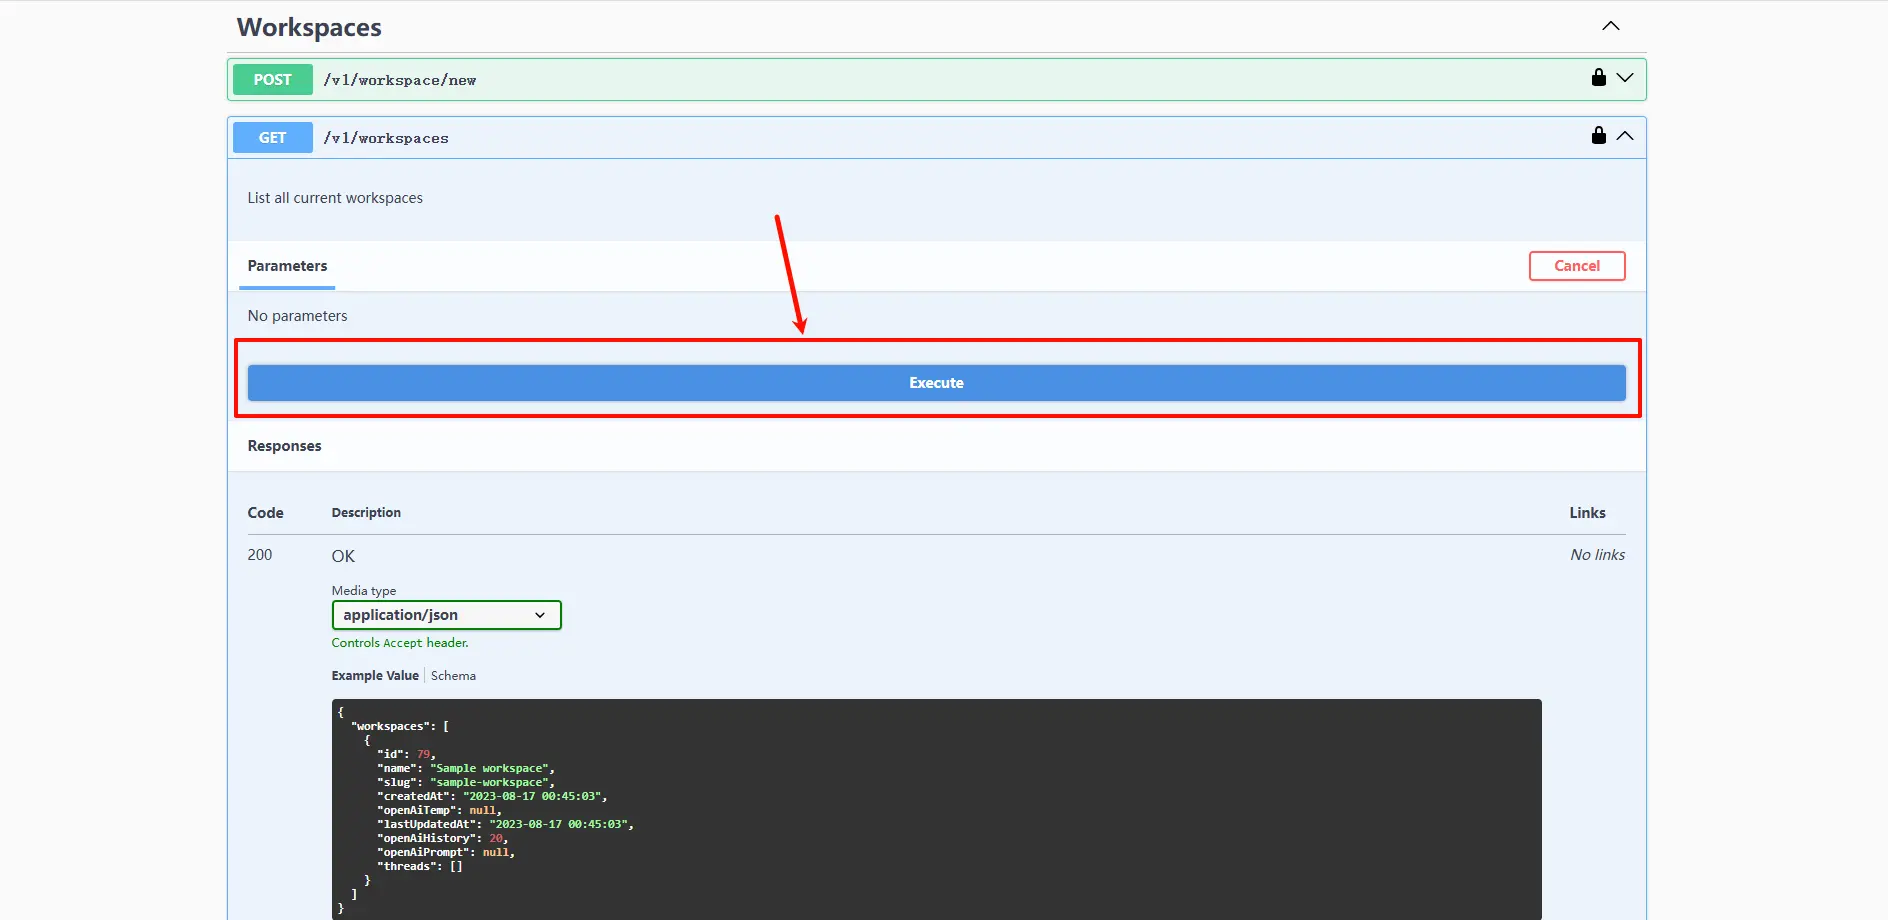
- 请求结果就会直接展示在下面
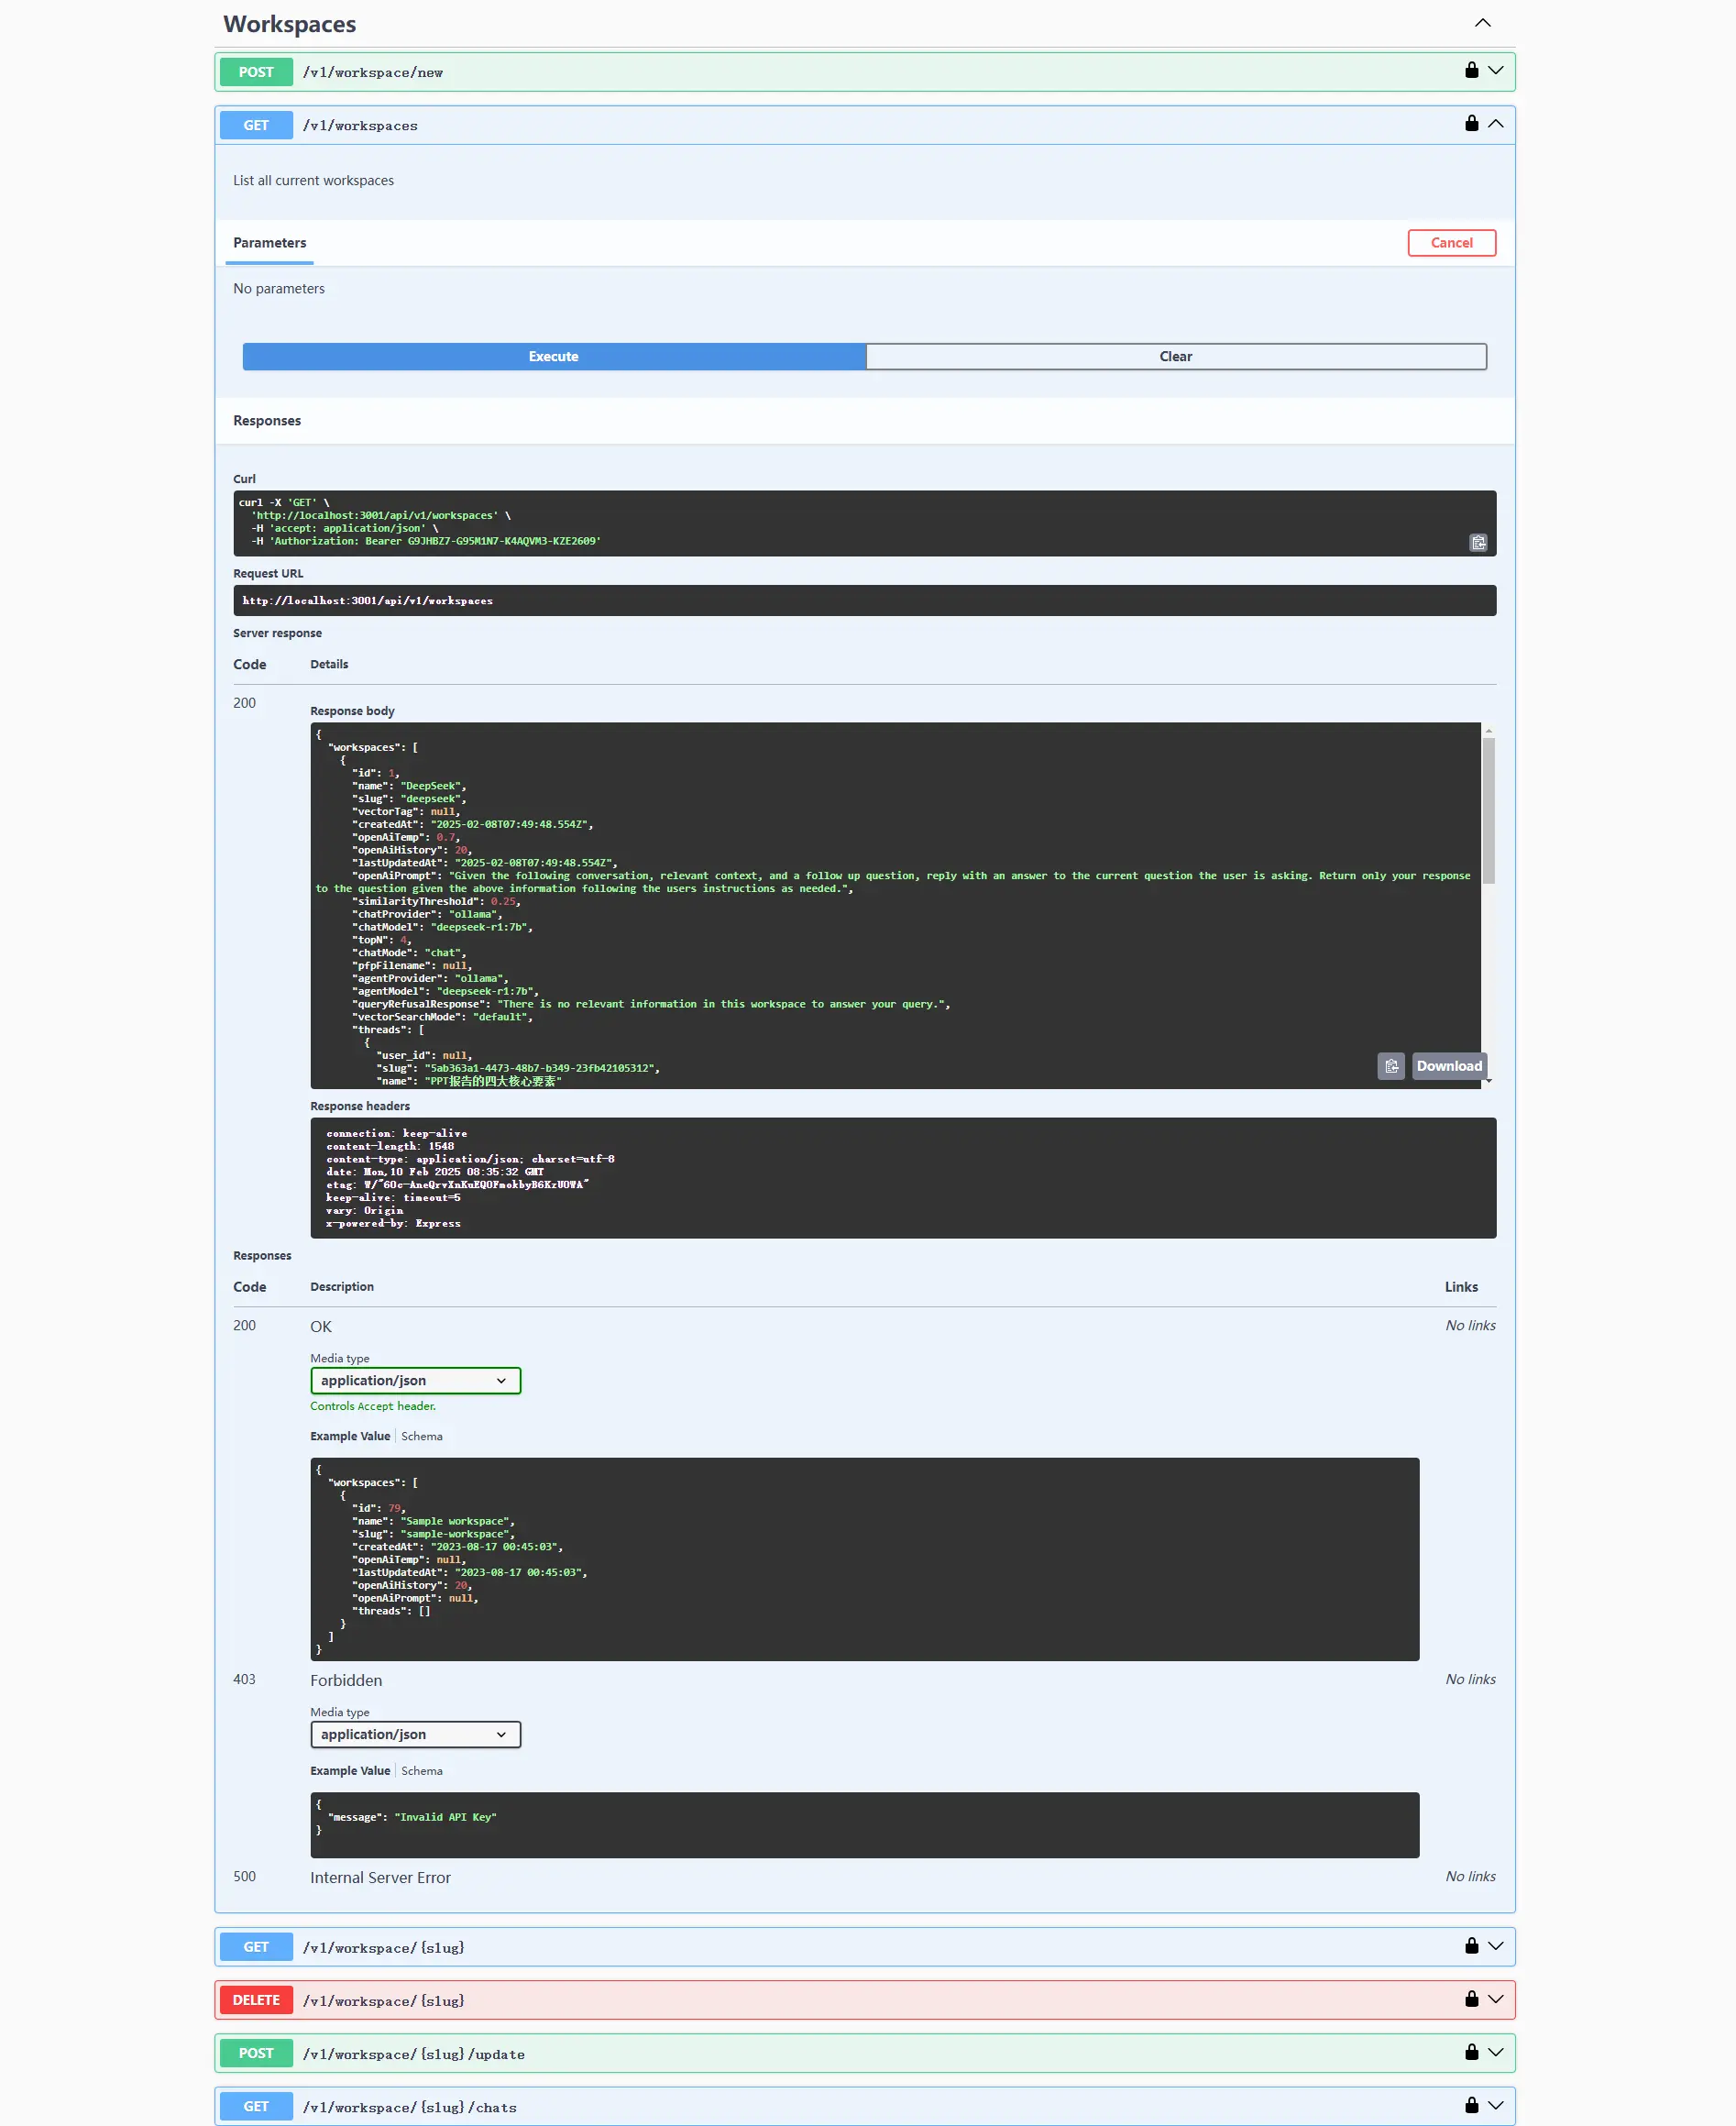 请求结果:
请求结果:
- 点击 Try it out 按钮
{
  "workspaces": [
    {
        "id": 1,
        "name": "DeepSeek",
        "slug": "deepseek",
        "vectorTag": null,
        "createdAt": "2025-02-08T07:49:48.554Z",
        "openAiTemp": 0.7,
        "openAiHistory": 20,
        "lastUpdatedAt": "2025-02-08T07:49:48.554Z",
        "openAiPrompt": "Given the following conversation, relevant context, and a follow up question, reply with an answer to the current question the user is asking. Return only your response to the question given the above information following the users instructions as needed.",
        "similarityThreshold": 0.25,
        "chatProvider": "ollama",
        "chatModel": "deepseek-r1:7b",
        "topN": 4,
        "chatMode": "chat",
        "pfpFilename": null,
        "agentProvider": "ollama",
        "agentModel": "deepseek-r1:7b",
        "queryRefusalResponse": "There is no relevant information in this workspace to answer your query.",
        "vectorSearchMode": "default",
        "threads": [
          {
              "user_id": null,
              "slug": "5ab363a1-4473-48b7-b349-23fb42105312",
              "name": "PPT报告的四大核心要素"
          },
          {
              "user_id": null,
              "slug": "f4e5b797-9896-415b-b2fe-9b2253ce534a",
              "name": "PPT报告的四大核心要素"
          },
          {
              "user_id": null,
              "slug": "e21a14d9-0936-4c55-8468-6645d7f3b278",
              "name": "没有网络能对话吗"
          }
        ]
    },
    {
        "id": 2,
        "name": "Test",
        "slug": "test",
        "vectorTag": null,
        "createdAt": "2025-02-10T06:55:30.355Z",
        "openAiTemp": 0.7,
        "openAiHistory": 20,
        "lastUpdatedAt": "2025-02-10T06:55:30.355Z",
        "openAiPrompt": "Custom prompt for responses",
        "similarityThreshold": 0.7,
        "chatProvider": null,
        "chatModel": null,
        "topN": 4,
        "chatMode": "chat",
        "pfpFilename": null,
        "agentProvider": null,
        "agentModel": null,
        "queryRefusalResponse": "Custom refusal message",
        "vectorSearchMode": "default",
        "threads": []
    }
  ]
}
1
2
3
4
5
6
7
8
9
10
11
12
13
14
15
16
17
18
19
20
21
22
23
24
25
26
27
28
29
30
31
32
33
34
35
36
37
38
39
40
41
42
43
44
45
46
47
48
49
50
51
52
53
54
55
56
57
58
59
60
61
62
63
64
2
3
4
5
6
7
8
9
10
11
12
13
14
15
16
17
18
19
20
21
22
23
24
25
26
27
28
29
30
31
32
33
34
35
36
37
38
39
40
41
42
43
44
45
46
47
48
49
50
51
52
53
54
55
56
57
58
59
60
61
62
63
64
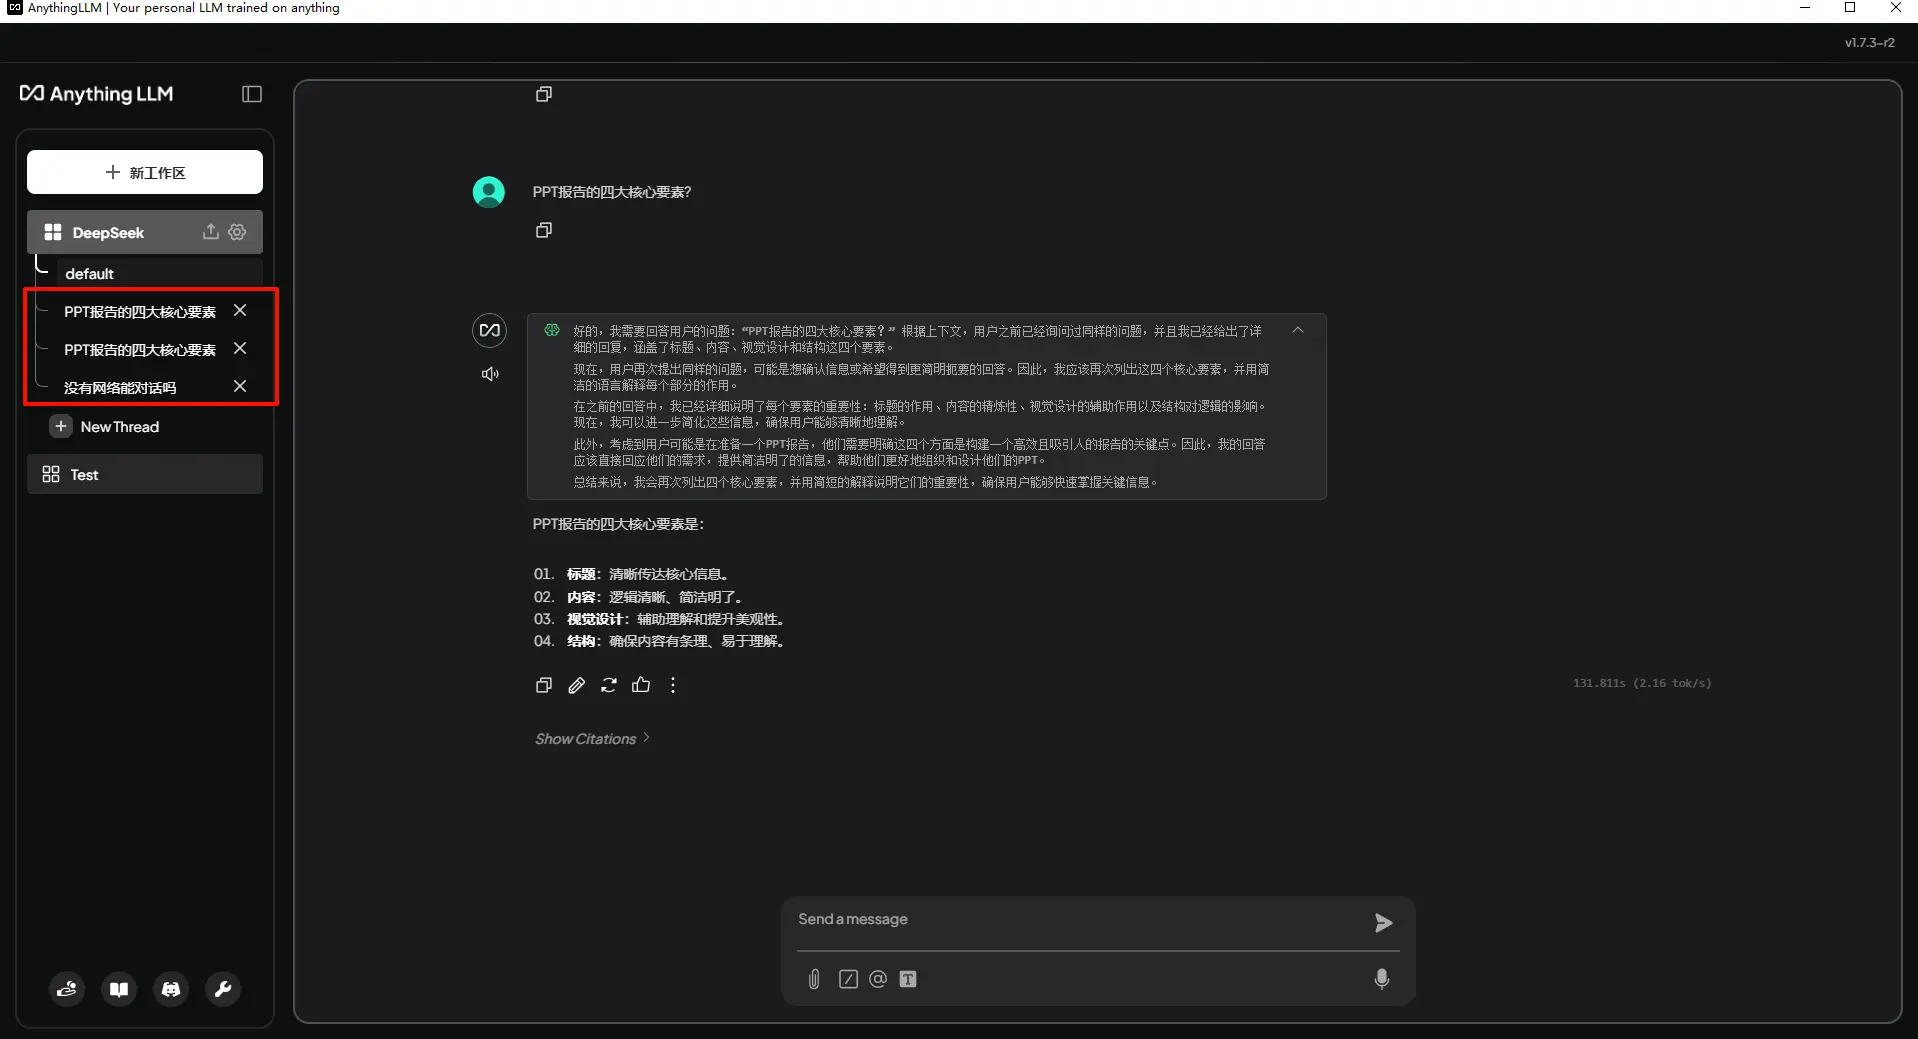
- 对比工作区
我们再看 AnythingLLM 程序中的工作区及对话,可以看出是和请求结果一致的
- 复制请求地址,在 Postman 中调试同样是可以的
编辑 (opens new window)
上次更新: 2025/02/12, 01:50:26